how to create a bootable USB drive for windows 10
In this article, we will be looking at how to create a bootable USB drive for Windows 10 using Windows 10 operating system.
There are many ways to create a bootable flash drive or USB drive for Windows 10. But today, we will be looking at the most simplest form of creating a bootable USB drive.
The most simplest form is using Etcher.
Learn – How To Install Vmware On Windows 10
Soon – Learn how to create bootable USB windows 10 with Rufus
Before we get started, certain prerequisites are required so that you do not have any hiccups or problems while creating a bootable USB drive for Windows 10.
Requirements
To Create a bootable USB Windows 10.
You should be logged in as an administrator.
All these tools Use files from C Drive, which is under administrative rights, and therefore you will require to be logged in as an administrator.
Else, even if the process goes. Quite well, you may have problems with the bootable drive or possibly after installing Windows 10 with that particular bootable drive.
Preferably a 3.0 USB stick.
It would be best if you had a 3.0 USB stick with a minimum of 8GB capacity. USB stick of 4GB is also OK, but it may crunch or fail.
The space usage is not exactly 4GB, and it is less than 4GB, and therefore the bootable process or the making of the bootable flash drive may crash.
The most important
You should have a Windows 10 ISO image ready with you. It should be accessible and should Not be corrupt or should not have any other problems.
Make sure you have the correct version of the Windows 10 installation ISO.
Once you are confident the above requirements are fulfilled, you can move on to creating a bootable USB drive for installing Windows 10.
If you are a visual follower then
Learn with video
How To Create A Bootable Usb Drive For Windows 10
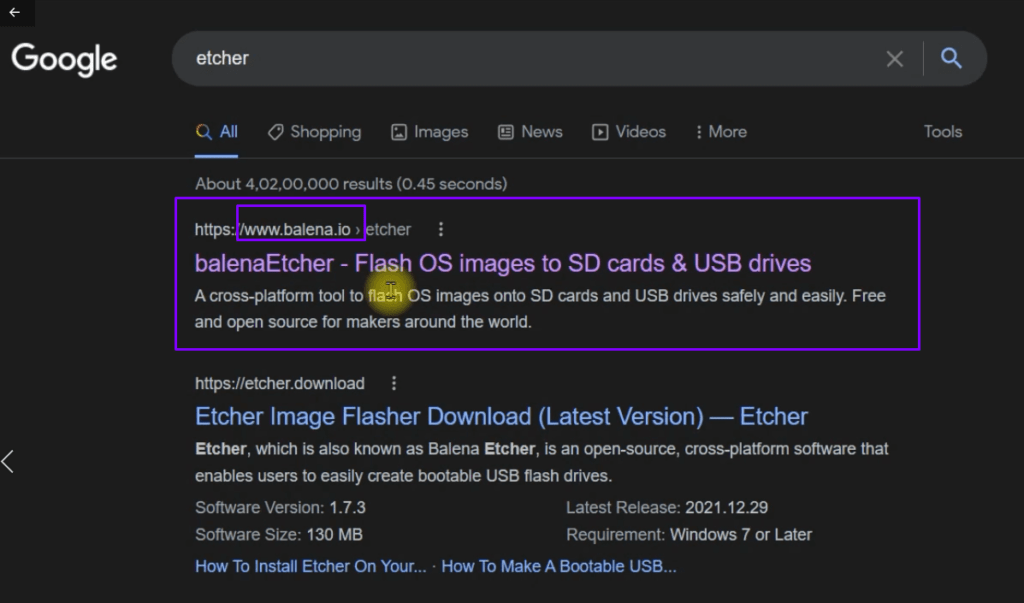
Open your favorite browser and type in Etcher
if you are not able to find it, here is the link to download Etcher
This is the simplest program that will help you create a bootable Windows 10 installation medium almost immediately and with the least effort
A word of caution
Always download this software’s from their official sources or websites only do not download it from any other media or website
They may contain adware or malware, which is quite risky for your computer
Now once you find the site which is highlighted in the image given below, click on balena.io
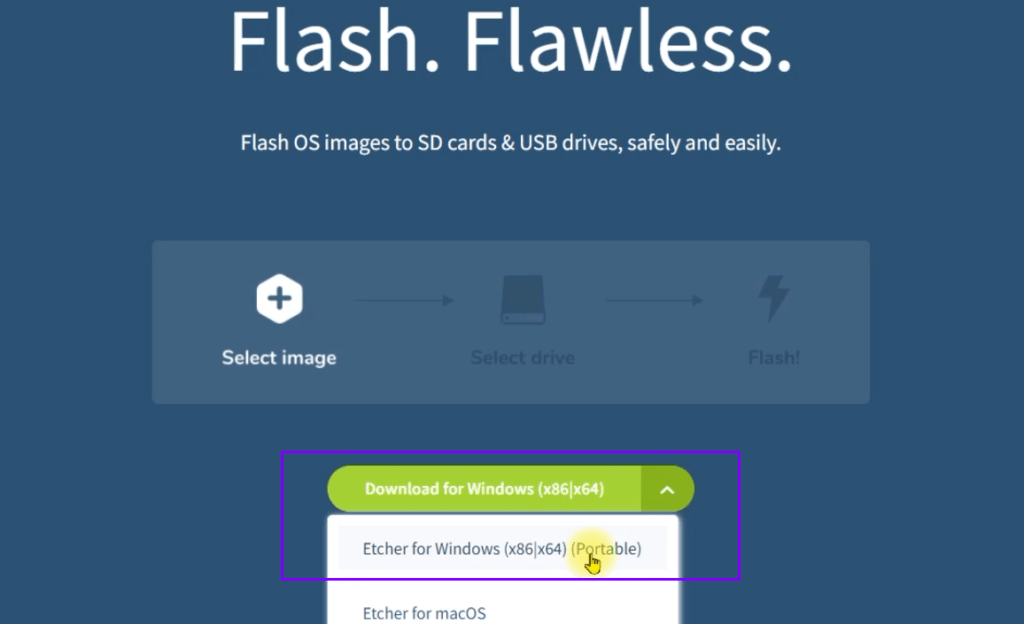
Download the portable version of this software because you’re just going to use it once, or if you want to download the installation media, click on the green button
Here I have downloaded the portable media, and so it is shown in the image given below
Before you open it, get your pen drive and insert it into the computer or your laptop.
Once you have downloaded it, go to the downloaded location and open it
You do not need to right-click and select run as administrator
Open it you will find the application running, as shown in the image below
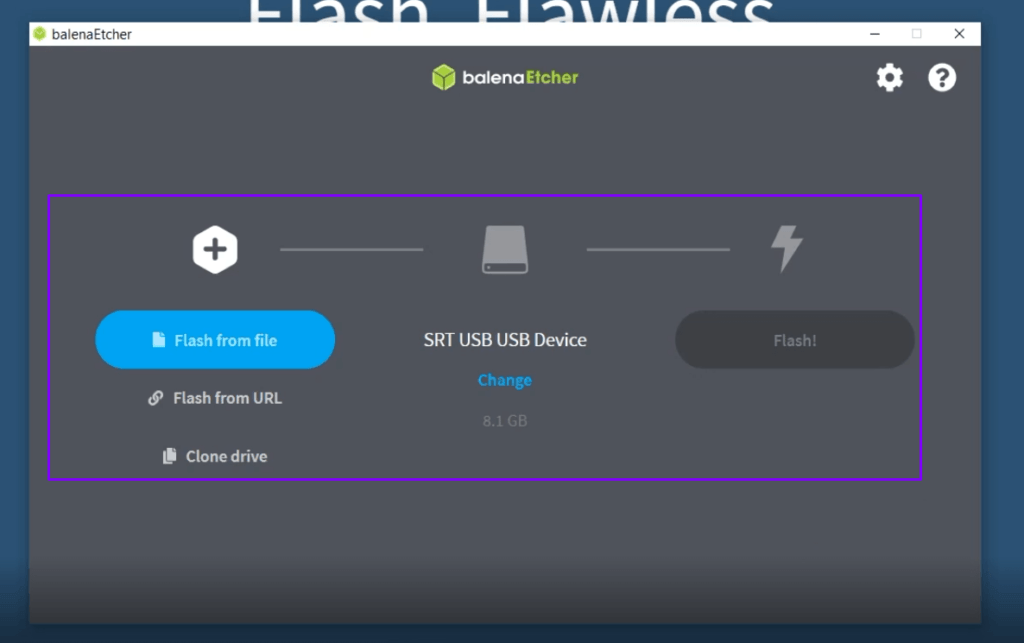
NOTE: If you do not see your flash drive in the center of the application or a name of the flash drive, then close the program, remove the flash drive and insert it again, and then again run the program
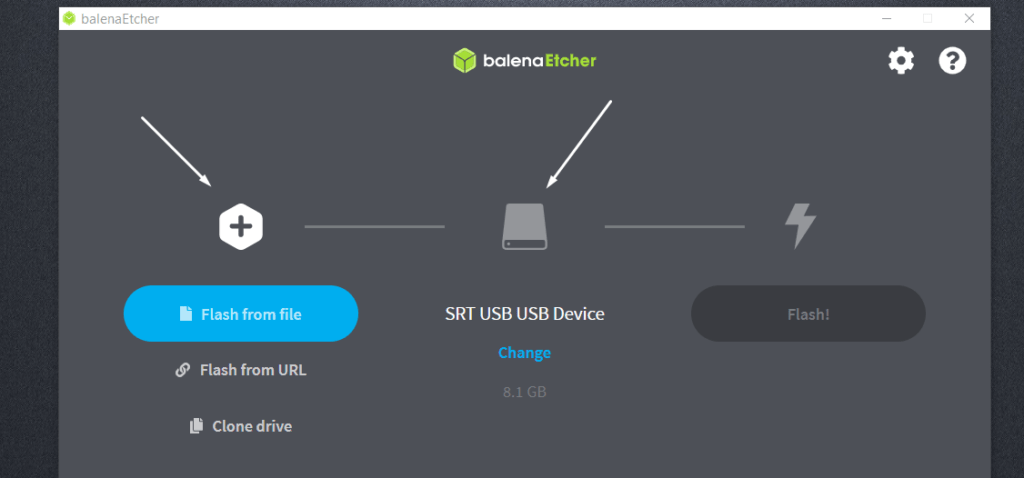
Let us now understand what we see
The leftmost icon on the application shows you to select the media through which you want to create the bootable Windows 10 flash drive
The icon in the center offers you which flash driver is going to be used to create a bootable disk
Caution: Make sure you have only one USB drive inserted into your computer or laptop in which you want to create the Windows 10 bootable USB drive. because once the bootable drive is created, the data on the USB flash drive is completely erased, and it’s not recoverable
And the last option is for flashing to begin the process
So let’s get started
Click on the leftmost option, which states flash from a file, and select the Windows 10 ISO image
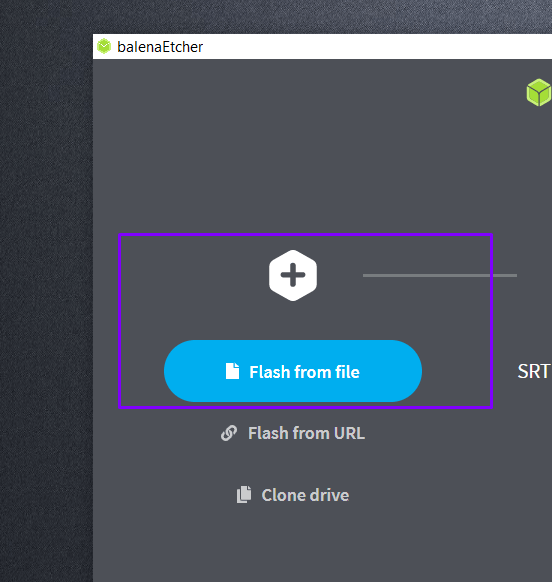
This is how you choose the image
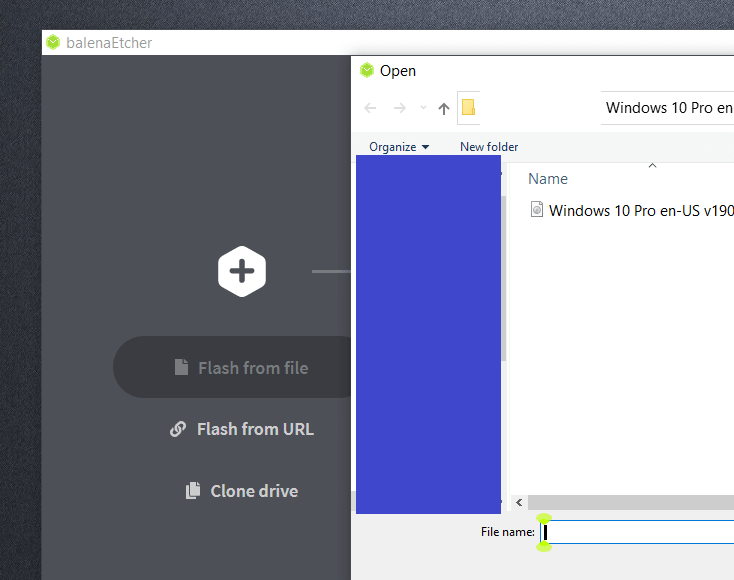
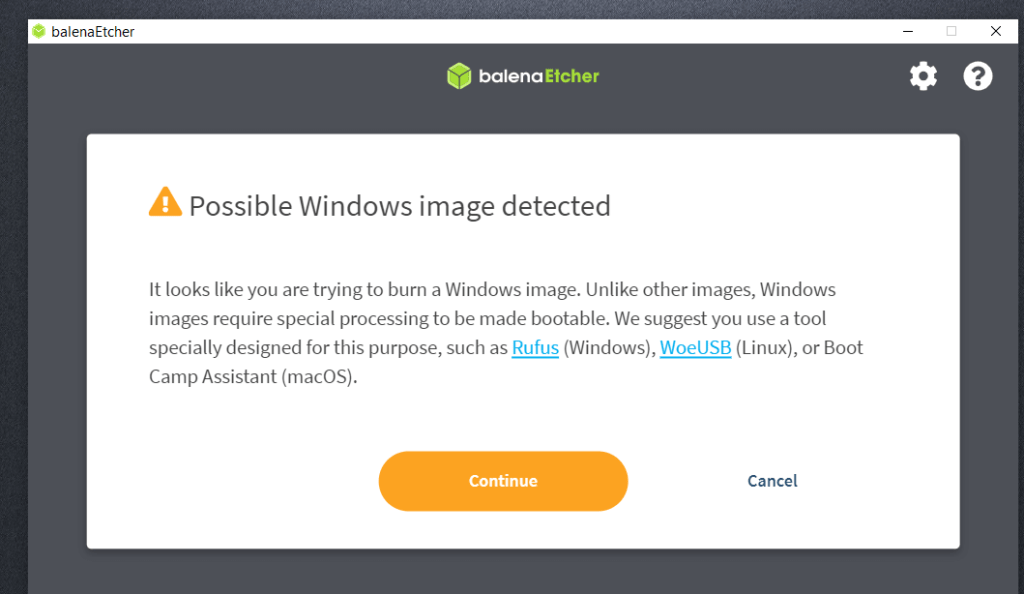
Oonce the image is selected and you click on open; immediately, you will get a pop-up like this
Do not worry about this pop-up. It may say that your bootable pen drive may not work, but we have tested it multiple times; it works flawlessly. So click on continue.
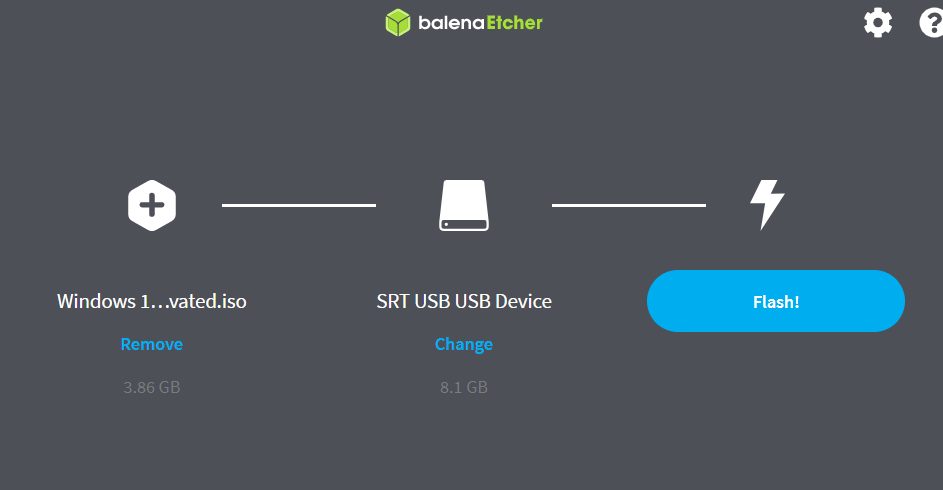
Once you click on continue, you will have this screen wherein the flash button is now highlighted with blue color.
For the last time, check that the USB which you have inserted in the correct USB or you have the option to change it
once you have confirmed now click on the flash
Once you click on the flash, you will be asked for administrative rights with windows command prompt
just click OK or yes to it
Once you click OK and yes to it now, you’re flashing process will begin, and you will see the screen as shown below
10
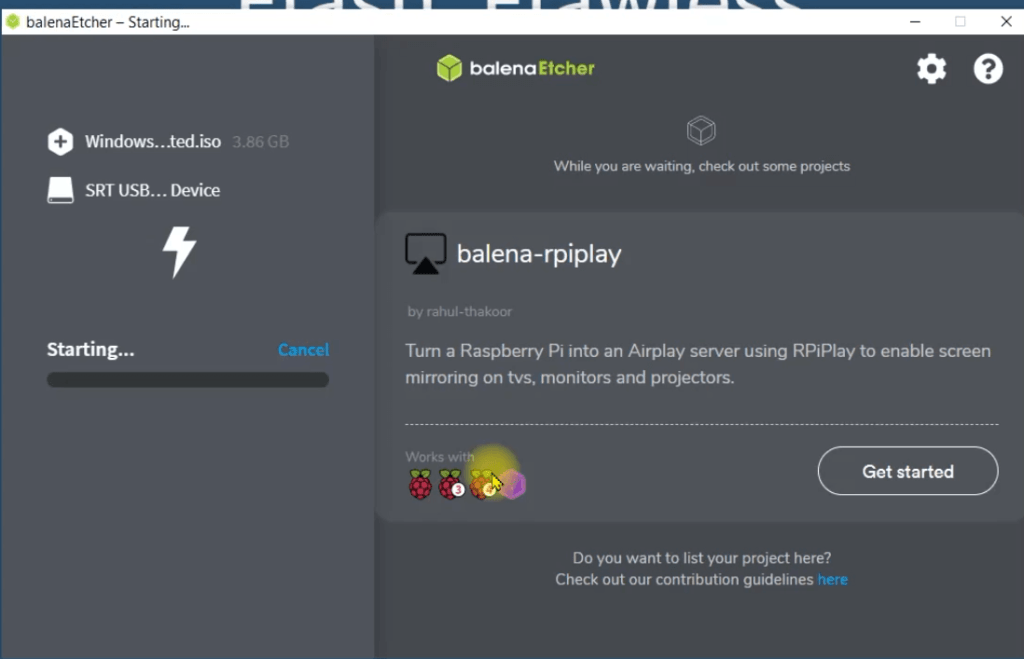
The flashing process normally takes 2 to 3 minutes but depending on whether you are using USB 3.0 or USB 2.0, it will take time because USB 3.0 is quite faster.
Also, it depends on your machine and your hard drive as well.
But those factors do not matter that much, so please be patient and let them run.
Once the flashing process is completed, it automatically starts a validation process. There is a button to skip the validation process, but it is highly not recommended.
Because this validation process checks whether the files on the flash drive are good or not, whether they are corrupted and whether your entire process has run correctly or not.
So Please be patient and let it run for another minute or minute and a half
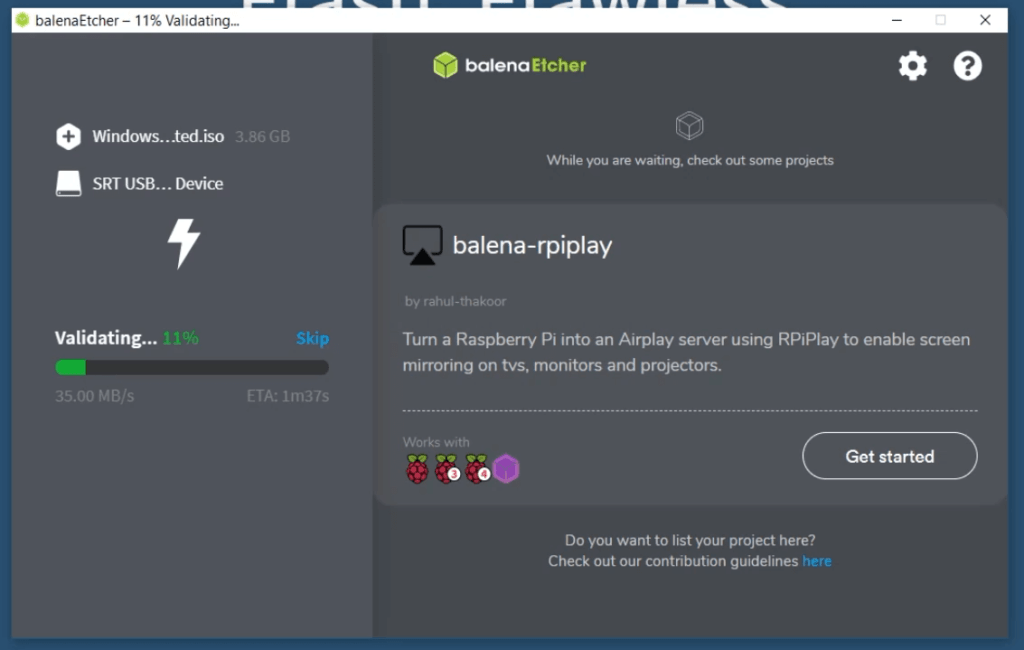
Once your flashing process is complete, you will get the message flash complete or flash another. Now you can close the application window, and you can remove the pen drive.
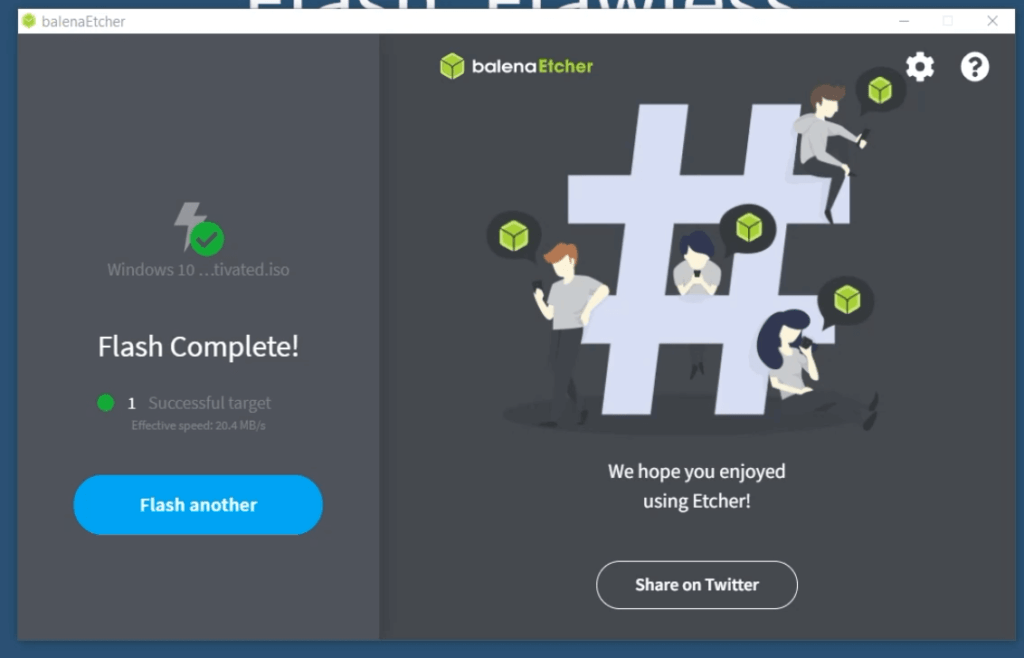
Congratulations, you have your Windows 10 bootable installation disk ready for your use.

Good article. I definitely appreciate this website. Stick with it!